Webflow’s drag-and-drop editor and pre-designed templates make website creation easy without coding. However, as your needs evolve, you may encounter limitations.
For instance, while Webflow’s membership capabilities are still in beta, WordPress has offered this feature for years through plugins like SureMembers. Similarly, for a stunning eCommerce site, you can rely on SureCart and leverage powerful plugins like Spectra for design blocks, wireframes, and templates.
In short, you’re not confined to proprietary software. WordPress offers more flexibility and functionality.To understand the detailed comparison between WordPress and Webflow, read our other blog. This guide will walk you through the migration process from Webflow to WordPress step by step.
A new way of managing and creating websites awaits you.
Let’s dive in!
Essentials for Migrating from Webflow to WordPress
When migrating from Webflow to WordPress, you’ll need a few essentials.
Webflow equips you with everything required to build and maintain a functional website:
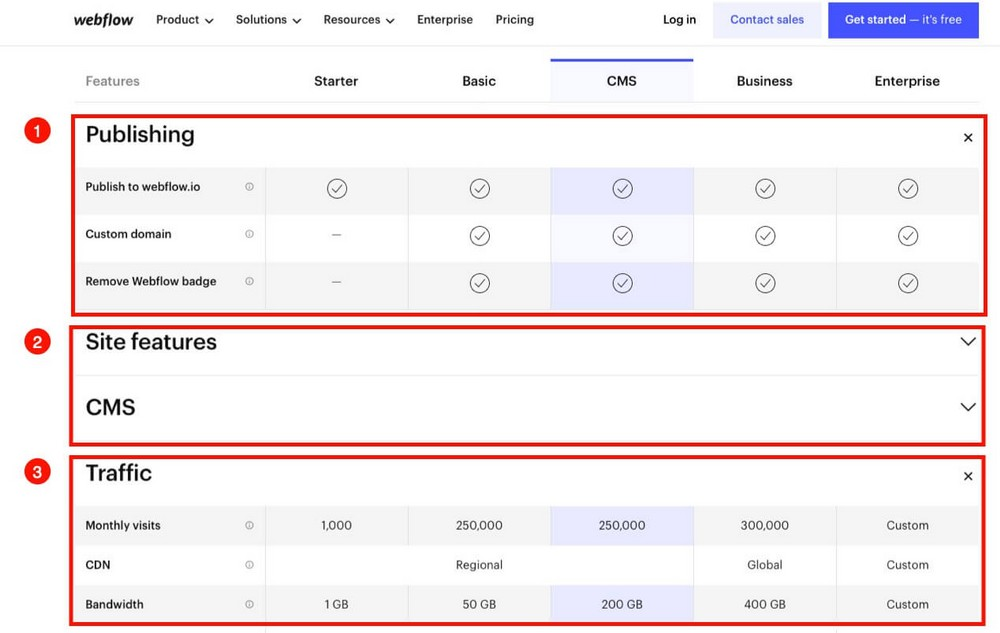
- A subdomain on webflow.io or the ability to connect a custom domain.
- The platform’s software for website creation.
- Hosting to store all your site’s components.
To migrate to WordPress, you’ll first need to replicate these elements:
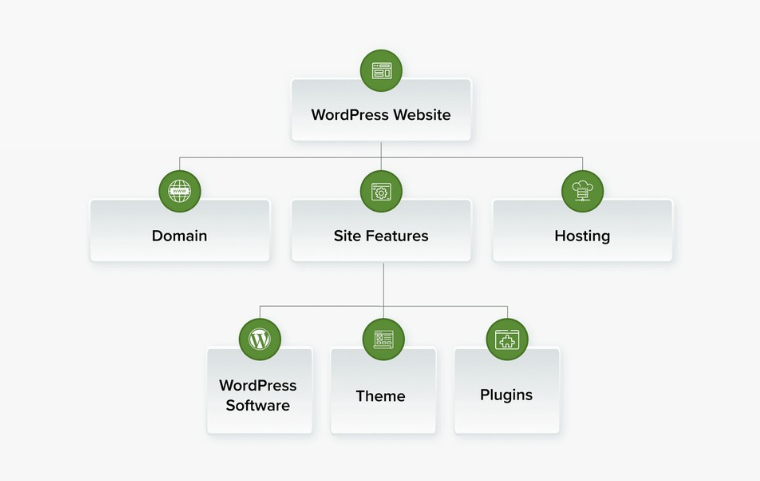
- Domain Name: If you already have a custom domain with Webflow, you’ll need to redirect it to your new hosting provider.
- Site Features: Install WordPress, choose a professional theme, and add plugins to replicate some of Webflow’s functionalities.
- Hosting: This is where all your website data will be stored.
Though it might seem like a lot, the process is actually quite simple. For a smooth migration experience, our expert WordPress developers at 42Works can assist.
Step-by-Step Migration Process from Webflow to WordPress
Migrating involves creating a new platform on WordPress and then transferring content from Webflow. Here’s how to do it step by step:
Step 1: Secure Hosting
First, you’ll need WordPress hosting to install and store everything. We recommend Hostinger or CloudWays, both of which offer reliable plans at reasonable prices. For this example, we’ll use CloudWays.
CloudWays offers various hosting options, from basic to advanced plans. The Digital Ocean basic plan is a good starting point, offering 1TB of bandwidth—more than Webflow’s $39/month business plan (subject to change).
It should be more than sufficient to begin with, but you can upgrade at any point if necessary.
Step 2: Install WordPress
Once you’ve signed up, the next step is to install WordPress on the Cloudways server you’ve purchased.
- Select WordPress as the application to install.
- Choose the server location that’s nearest to where most of your customers are based.
- Install WordPress on Cloudways.
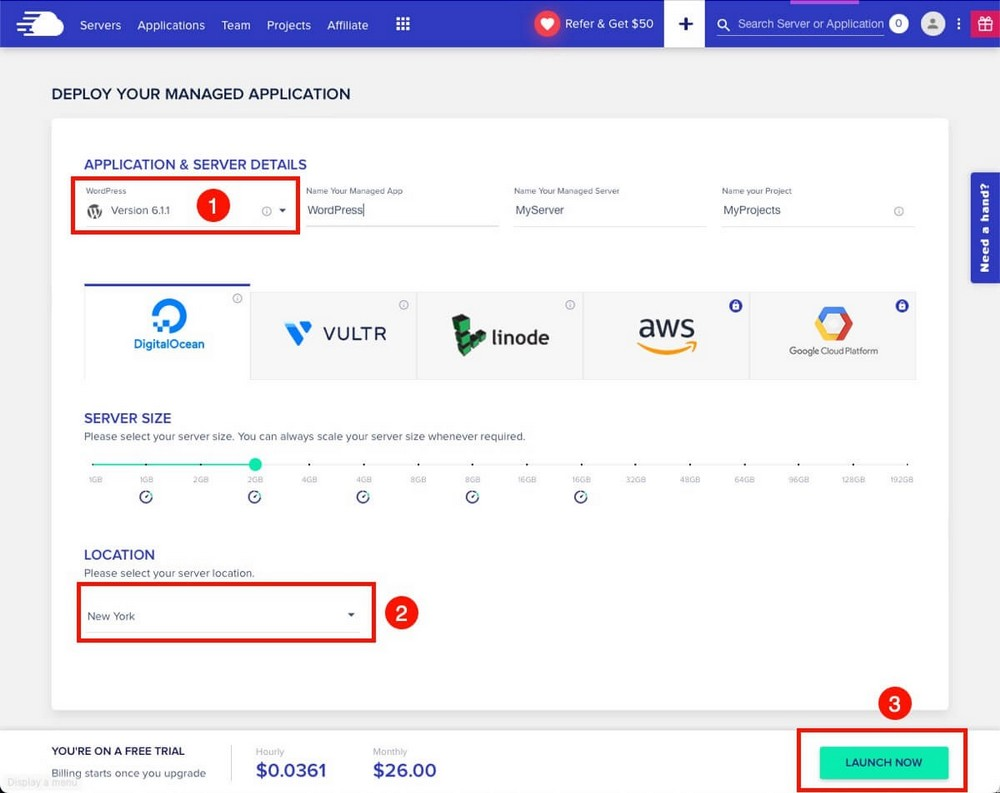
You have the option to increase the server size at this stage if needed. Otherwise, keep all the settings as they are and click “Launch Now” to complete the server setup and WordPress installation.
Step 3: Customize WordPress
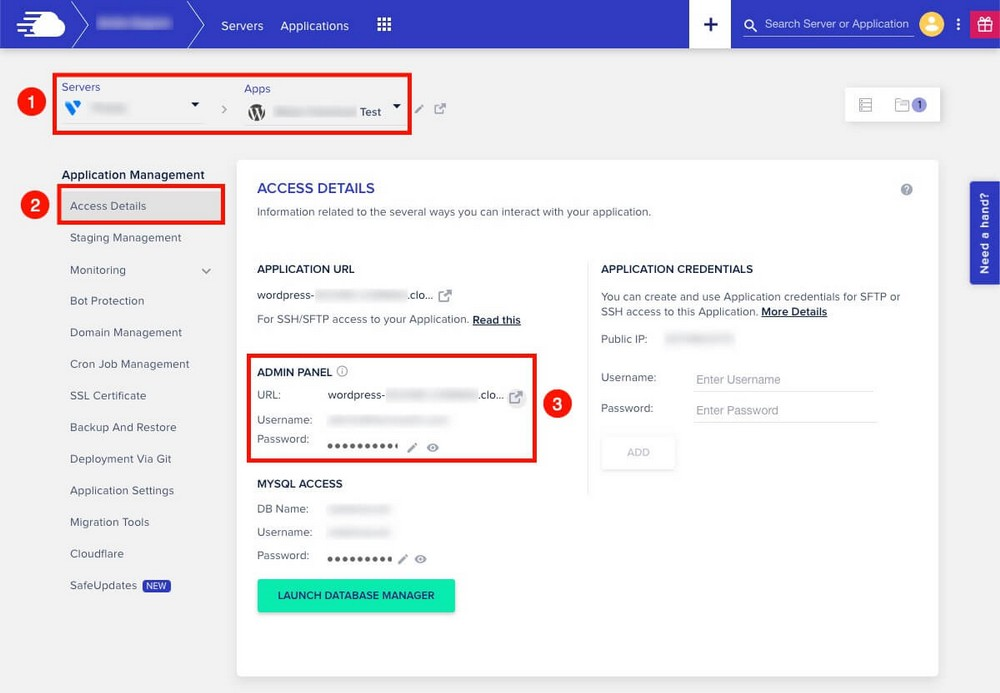
Access the WordPress installation you just set up and locate your admin login credentials in the Access Details tab.
You’ll notice that Cloudways provides a temporary free domain, which appears as a subdomain like name.cloudways.com—similar to the subdomain format used by Webflow (domain.webflow.io). Use this URL and your credentials to log into your WordPress installation.
Once logged in, you’ll be taken to the WordPress administration panel, which shares some similarities with Webflow’s dashboard.
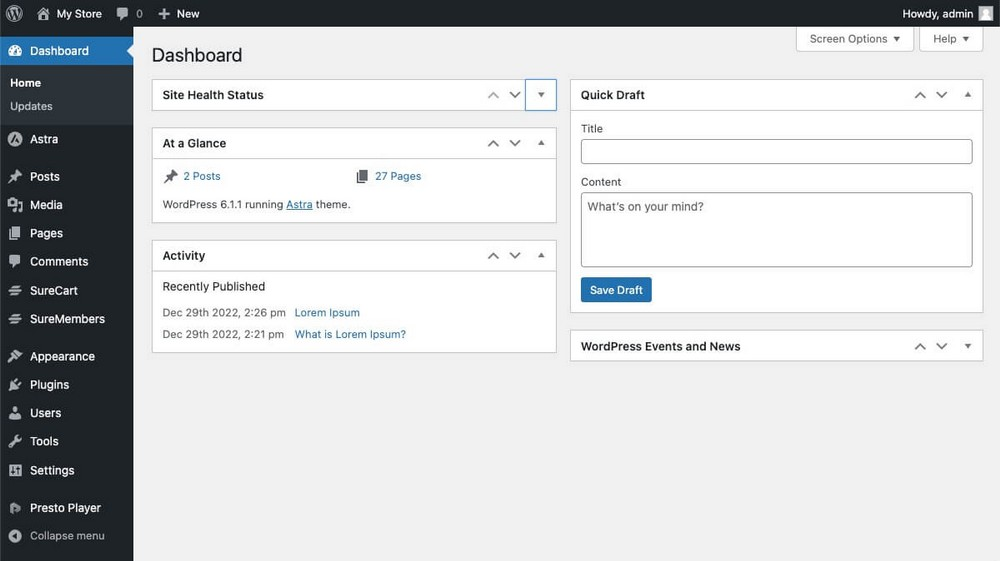
Now it’s time to start customizing WordPress.
First, you’ll need to choose a theme. We recommend Astra, a lightweight and fast theme that can be easily tailored to your needs.
While WordPress already includes a block editor for design, you can opt for something more robust by installing Spectra, which offers additional blocks and features.
WordPress is highly flexible, supporting hundreds of plugins, themes, and options. For now, we suggest focusing on the design aspects to proceed smoothly with the migration process.
Step 4: Export Webflow Content
With your new WordPress platform ready, it’s time to fill it with content. From the Webflow dashboard, go to the CMS Collection section. Select the content you want to move (e.g., blog posts) and click “Export.”
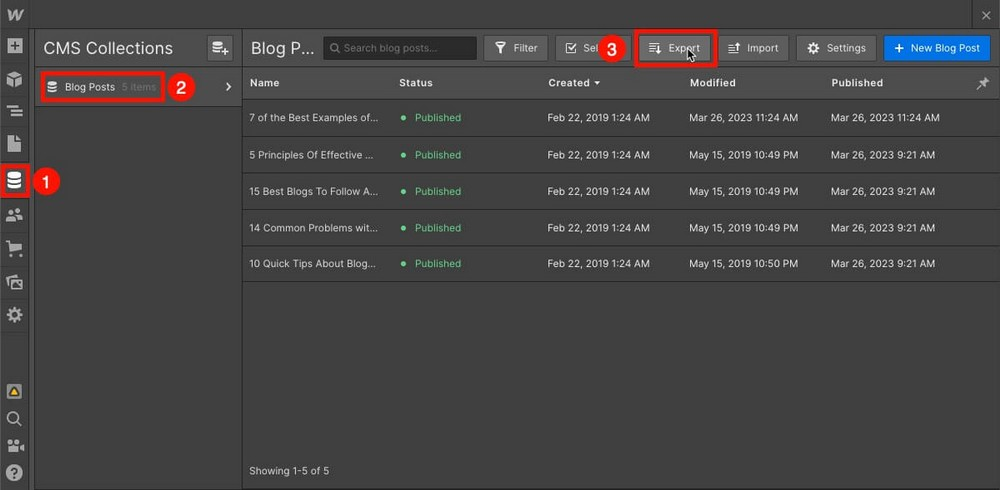
You’ll get a CSV file with the selected items.
Repeat this step for other collections, but note that static pages and images can’t be exported.
Important: At this stage, avoid making any changes in Webflow. If you add new content, it won’t be imported into WordPress, as the content has already been downloaded. For expert help with WordPress, reach out to 42Works.
Step 5: Import Content to WordPress
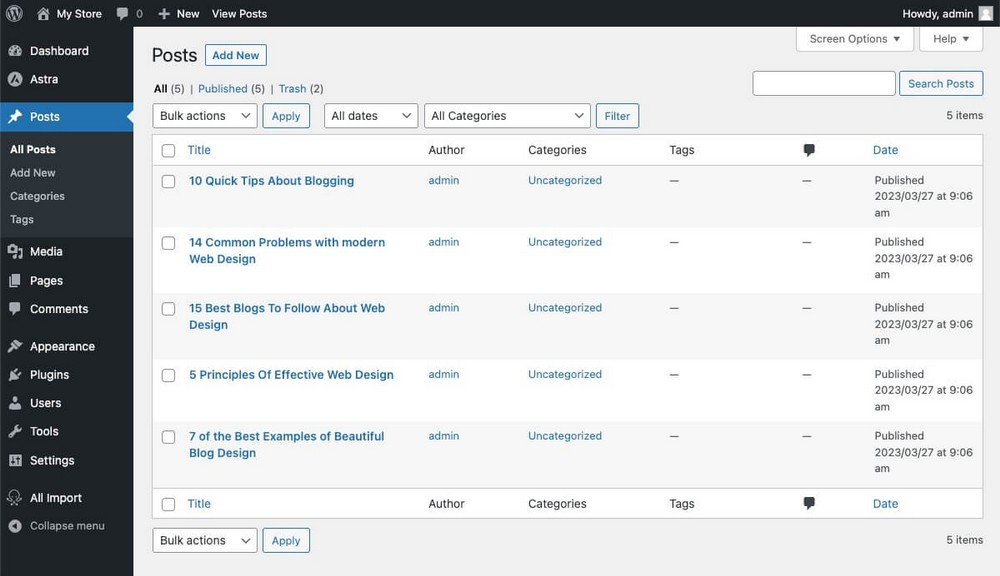
Now, import the content from Webflow into WordPress. WordPress doesn’t natively support CSV files, so install the free plugin WP All Import.
Import the file, specify the content type, and create an import template. Run the import, and your articles will appear on the WordPress Posts page.
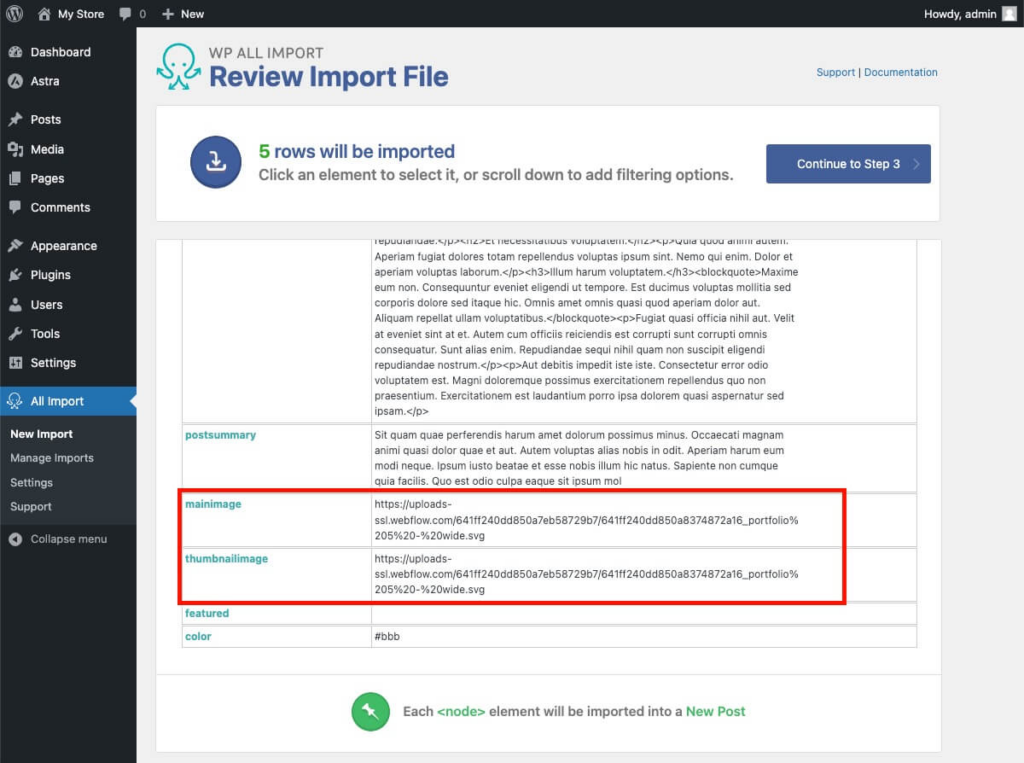
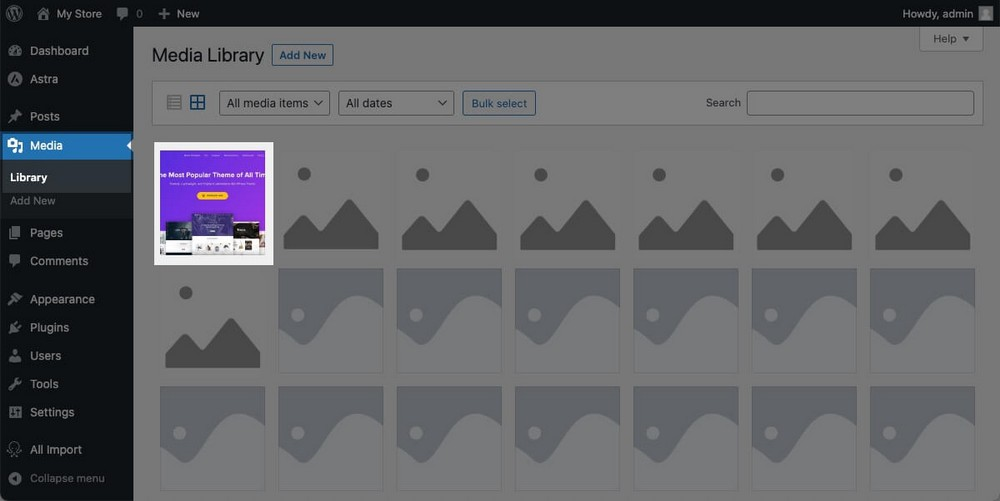
Step 6: Re-upload Images
Webflow doesn’t permit direct export of images.
Instead, it references them using code, so while they will appear in your WordPress posts, the images are still hosted on Webflow and will disappear if you delete your account.
To address this efficiently, you can use the Auto Upload Images plugin, which:
- Scans your articles for images embedded from external sites.
- Downloads those images from their original sources, uploads them to WordPress and replaces the old references.
Auto Upload Images is simple to use once installed and activated:
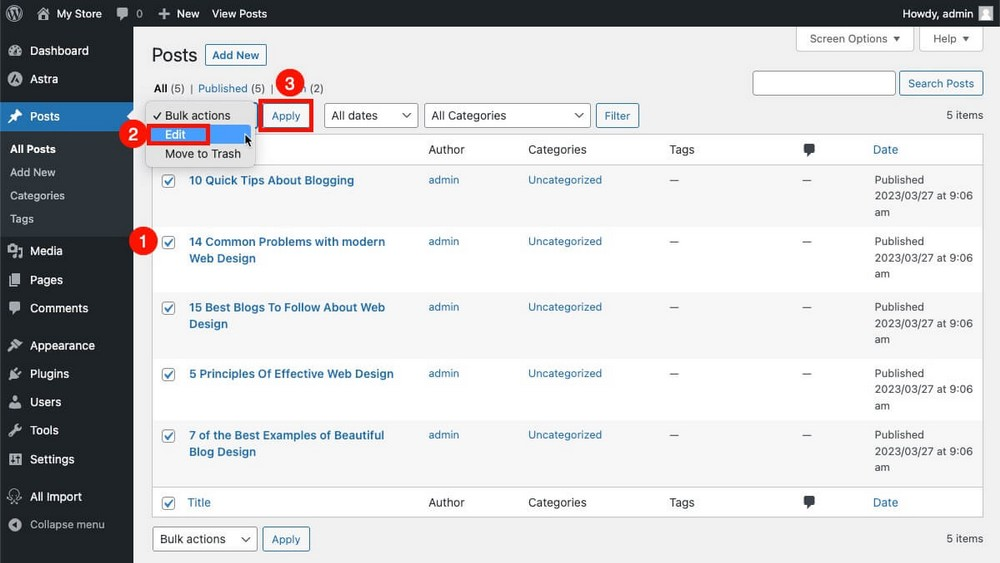
- Bulk edit your posts in WordPress by going to Post > All Posts.
- Select all posts.
- In the first dropdown menu, choose Edit.
- Click the Apply button.
- In the edit panel, leave everything unchanged and click Update.
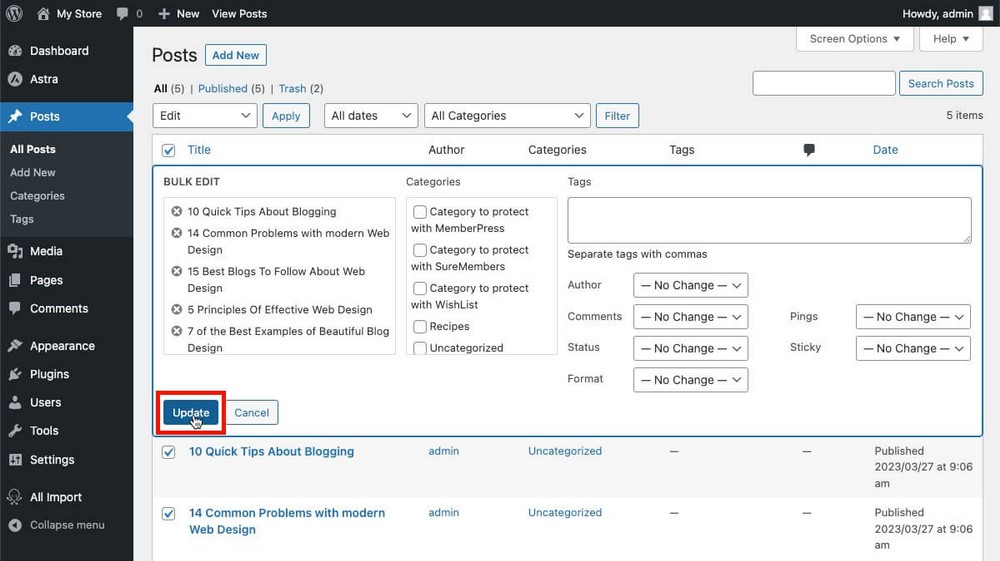
The plugin will then work in the background, ensuring that all linked images are now hosted directly on your WordPress site.
This will ensure your multimedia is properly imported from Webflow.
Step 7: Redirect Your Domain
Your website is now fully functional, but it’s currently accessible only via the temporary URL provided by Cloudways.

At this point, your domain is still pointing to the site you created on Webflow.
To resolve this, you’ll need to follow these two steps:
- Add Your Domain in Cloudways:
- Go to the Cloudways dashboard, add the domain you wish to use, and set it as the primary domain.
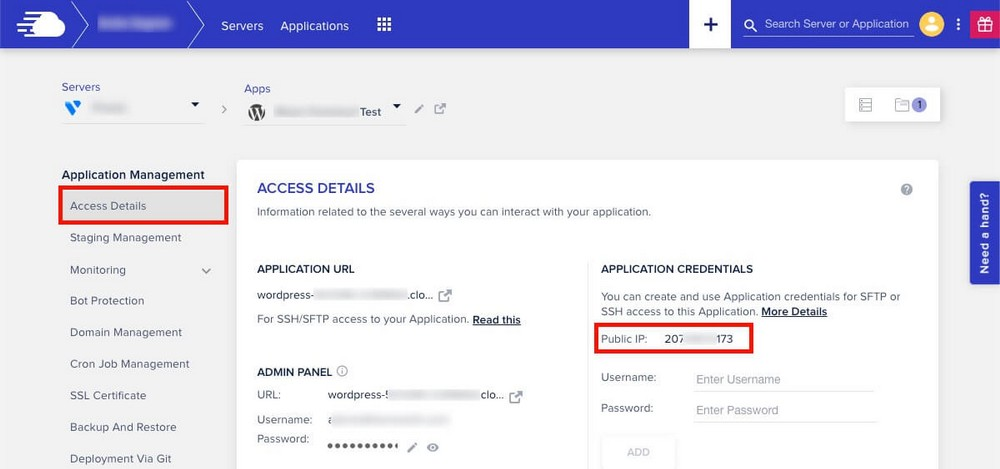
- Copy Your Server’s Public IP:
- You can find this in the Access Details tab on Cloudways.
Next, you’ll need to go to your domain registrar and update a couple of settings to redirect your domain from Webflow to Cloudways. This involves modifying your DNS by adding two new records.
Here’s how you can do it, for example, on Namecheap:
- A Record:
- Host/Name: @ or leave blank.
- Value/Target: The IP address you copied.
- TTL: Set to Automatic/Default.
- CNAME Record:
- Host: www
- Value: Your domain name (e.g., nameofyourstore.com)
- TTL: Leave as Default.
After making these changes, it may take up to 48 hours for the updates to propagate. If you encounter any issues, your domain registrar or new web host should be able to assist. For round-the-clock support and expert help, 42Works provides 24/7 assistance to ensure a smooth transition and resolve any concerns you may have.
Final Steps After Migration
After migrating, manually check and recreate static pages in WordPress, rebuild the navigation menu, and install extra plugins for features like contact forms. Ensure all necessary code, such as Google Analytics or Meta Pixels, is reinstalled. Test everything to confirm the migration’s success, then close your Webflow account to avoid extra costs.
For tailored migration services, consider partnering with 42Works. Contact us now!
FAQs:
Why should I move my website from Webflow to WordPress?
Switching from Webflow to WordPress offers more flexibility for business growth. WordPress is more cost-effective since the CMS is free; you only pay for hosting and plugins. Its open-source nature ensures your website remains adaptable for the future.
Will I lose my content when migrating from Webflow to WordPress?
No, you can migrate your content from Webflow to WordPress without losing it. The process involves exporting your content from Webflow and importing it into WordPress. Following the correct steps ensures a smooth transfer.
Is WordPress Easier to Use Than Webflow?
Yes, WordPress is generally easier to use thanks to its modular structure and extensive user feedback over nearly 20 years. Themes like Astra also simplify the process with user-friendly interfaces.
What are the costs of migrating from Webflow to WordPress?
The costs vary depending on whether you handle the migration yourself or hire a professional. WordPress itself is free, but you’ll need to consider hosting, domain, and potential premium themes or plugins. Hiring a professional will incur additional costs.
How long does it take to migrate a website from Webflow to WordPress?
The migration timeline depends on the complexity of your website. A simple site might take a few hours, while a more complex site could take several days. Proper planning and execution are key to a smooth transition.
Can I Migrate Webflow Memberships to WordPress?
No, migrating Webflow memberships to WordPress is not feasible due to the system’s complexity and export limitations. For alternative solutions and support, contact 42Works.
Final Thoughts on Moving From Webflow to WordPress
Migrating from Webflow to WordPress is straightforward once your new WordPress site is set up and designed. WP All Import will help with transferring content, while the Auto Upload Images plugin will manage image migration. Despite the differences between Webflow and WordPress, 42Works offers comprehensive support to ensure a smooth transition and successful website launch.